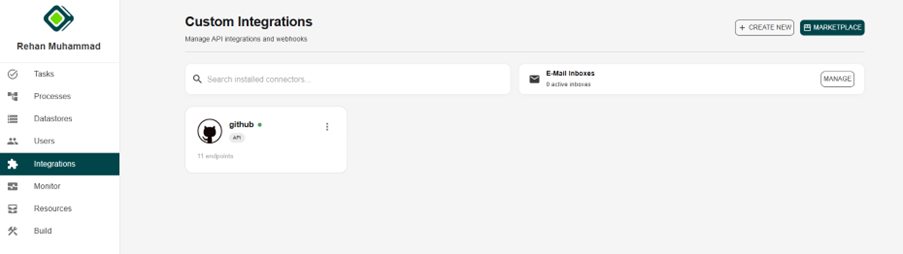
Custom Integrations
With this option, users can:
- Connect proprietary or third-party services.
- Configure API keys and authentication details.
- Define custom workflows and data exchanges.
- Extend the platform according to specific organizational requirements.
This option is recommended when integrating internal systems or APIs that are not available in the marketplace.
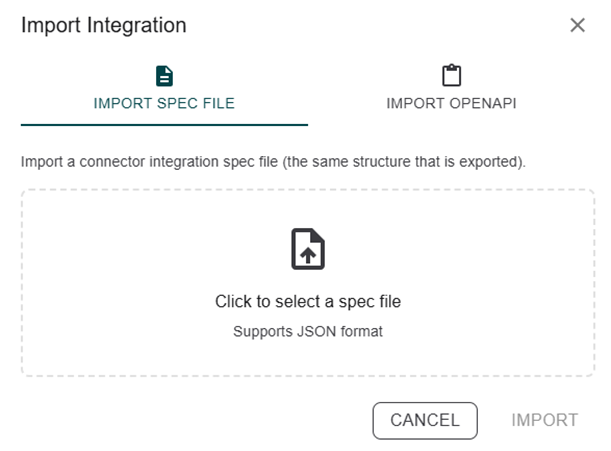
You can also import your integrations using a spec file or OpenAPI spec.
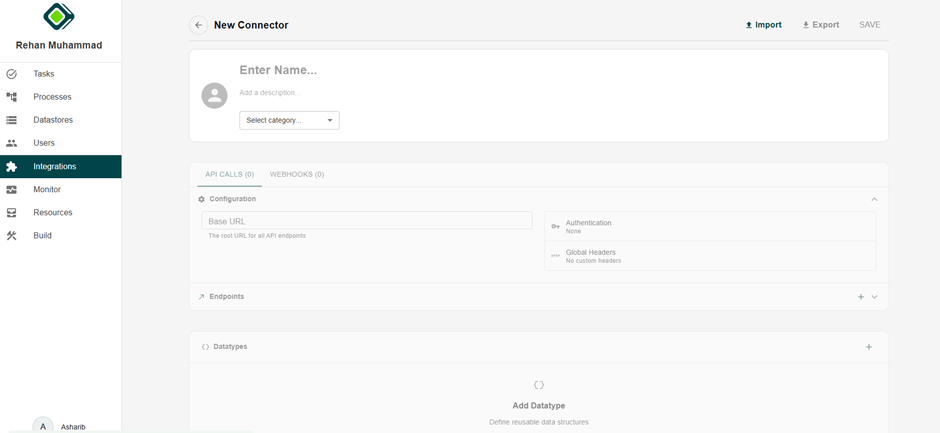
API Integration Configuration
After creating a new integration, users must configure the API connection by providing the required settings. This section allows users to define how metamorphOS communicates with the external API.
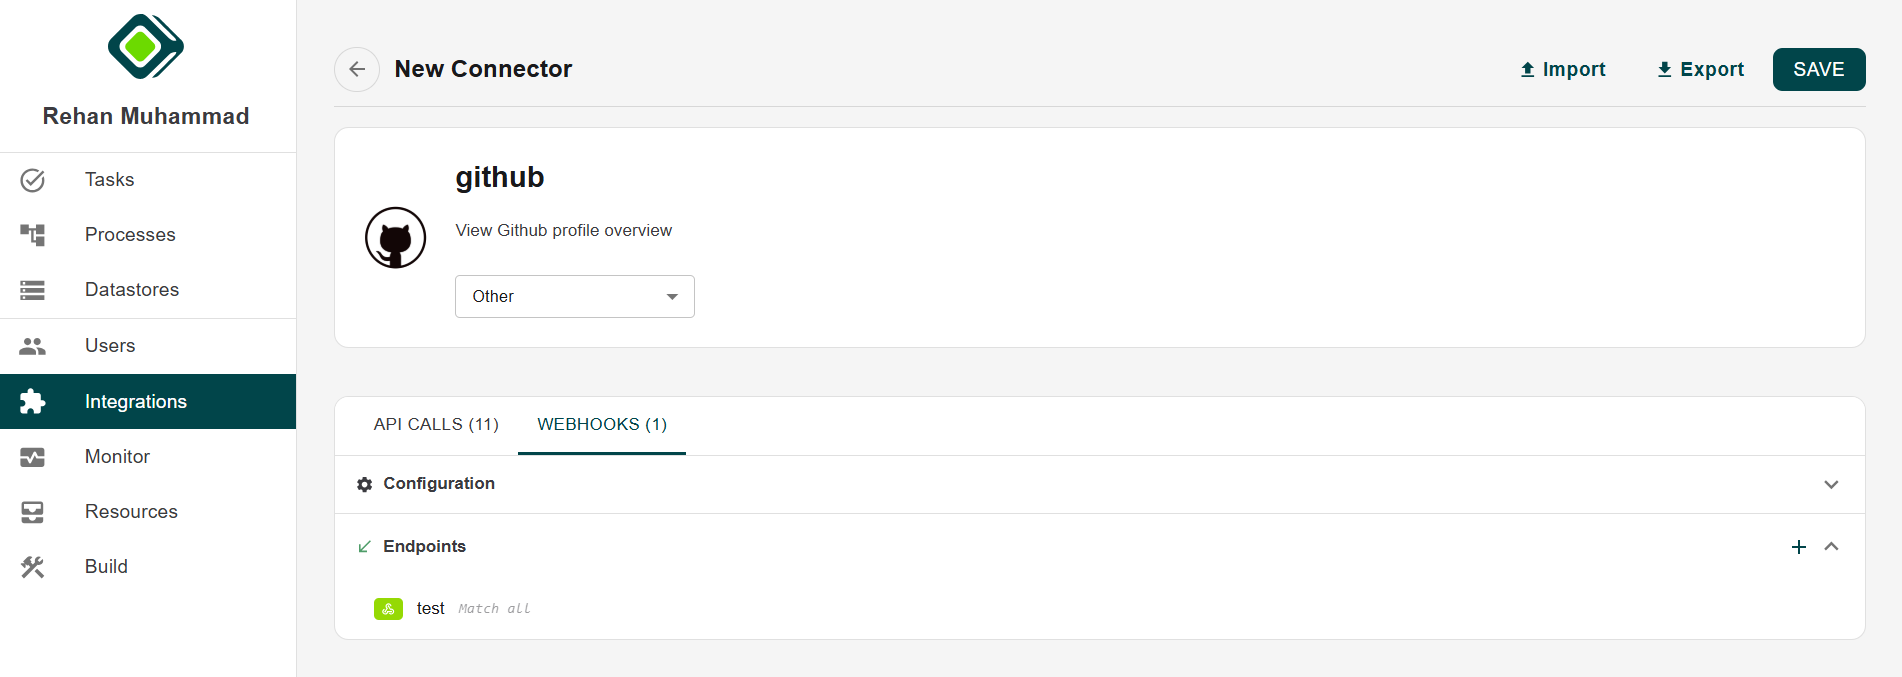
API Calls and Webhooks
The integration interface provides two main components:
- API Calls – Used to define requests that MetamorphOS will send to the external API to retrieve or send data.
- Webhooks – Used to receive real-time notifications or data from external systems when specific events occur.
Configuration
The Configuration section defines the core connection details for the external API.
Base URL
The Base URL represents the root address of the external API.
- All API endpoints will be built using this base URL.
- It ensures that every request sent from MetamorphOS is directed to the correct API service.
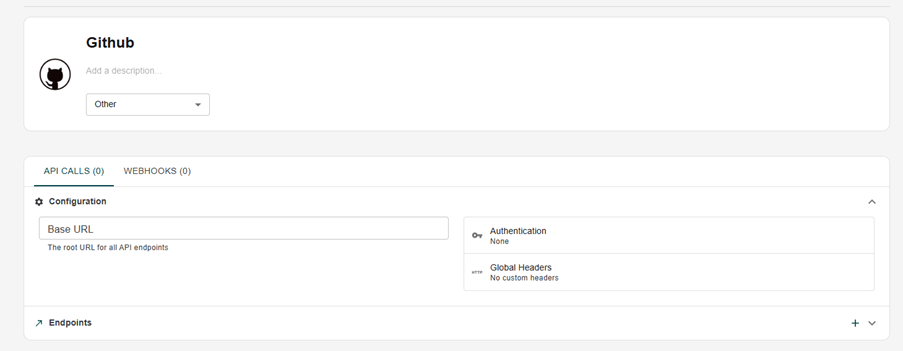
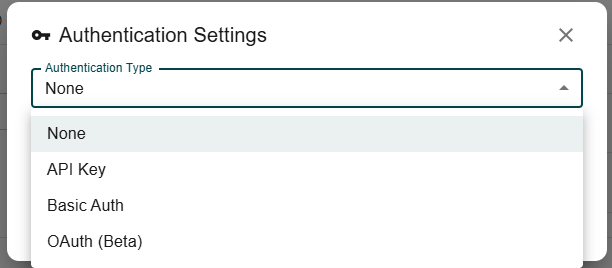
Authentication
This section specifies the authentication method required to access the API.
Depending on the external service, authentication may include:
-
API Keys
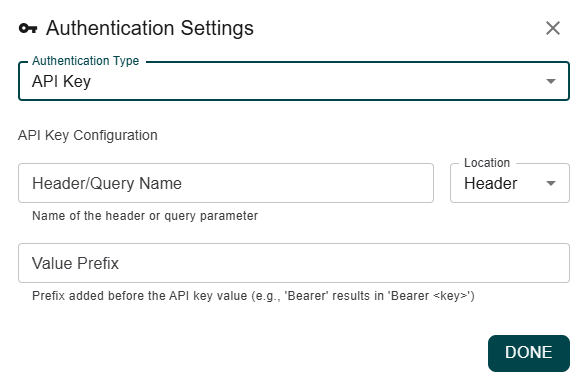
-
OAuth
-
Basic Authentication
Proper authentication ensures that requests sent from MetamorphOS are authorized by the external system.
Endpoints
The Endpoints section allows users to define specific API routes that MetamorphOS will interact with.
Users can:
- Add new endpoints
- Define request methods (GET, POST, PUT, DELETE)
- Configure request parameters
- Specify request bodies
- Process API responses
Each endpoint represents a specific action or operation performed through the external API.
To create a new endpoint:
- Click the ”+” icon in the Endpoints section.
- Enter the endpoint path and request method.
- Configure parameters, headers, and request body if required.
- Save the endpoint configuration.
Once configured, these endpoints can be used within MetamorphOS workflows and automation processes.
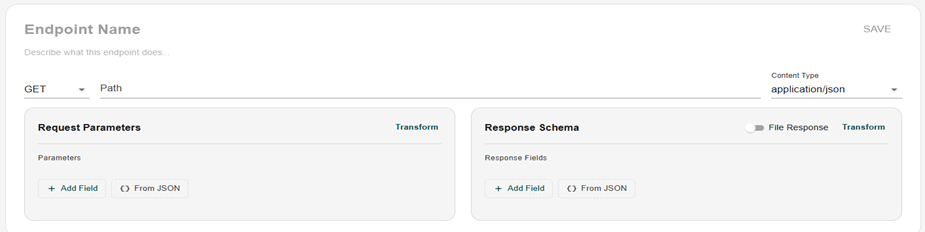
Endpoint Configuration Fields
HTTP Method
The HTTP method defines the type of operation performed on the API.
Common methods include:
- GET – Retrieve data from the API
- POST – Create new resources
- PUT/PATCH – Update existing resources
- DELETE – Remove resources
Path
The Path specifies the API route relative to the Base URL.
Dynamic parameters can be used with ${your_variable_name} within the path to make the endpoint reusable.
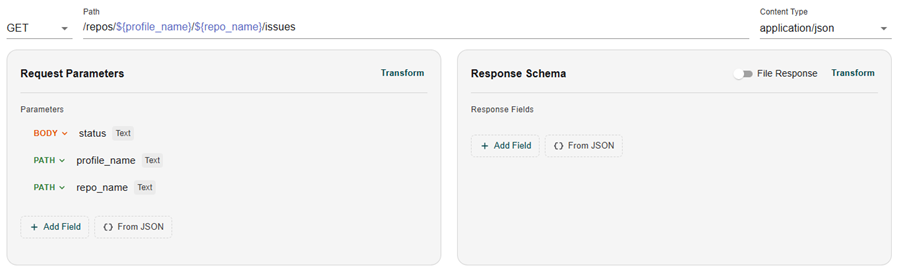
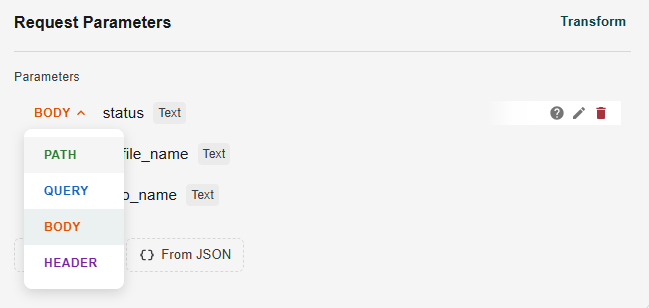
Request Parameters
The Request Parameters section defines the inputs required when calling the endpoint.
Parameter types may include:
- PATH – Parameters embedded in the endpoint URL
- BODY – Parameters included in the request body
- QUERY – Parameters appended to the URL as query strings
- HEADER – Parameters included in request headers
Response Schema
The Response Schema defines the structure of the data returned by the API.
Users can:
- Manually define response fields using Add Field
- Automatically generate the schema using From JSON by pasting a sample API response
This structured response allows the platform to map API data into workflows, automation tasks, or internal system components.
The File Response option can be enabled when the API returns files instead of standard JSON data. This is useful for APIs that return downloadable content such as documents, images, or reports.
Transform
Both Request Parameters and Response Schema provide a Transform option.
This allows users to manipulate or format data before sending the request or after receiving the response.
Transformations may include:
- Data formatting
- Field mapping
- Data filtering
- Value conversions
After successfully configuring and saving the endpoint, the integration will become active within the system and the green dot appears indicating it is active. Once the setup is completed, the configured API call will appear in the API Call section of the integration dashboard.
Applying Webhooks
Webhooks allow external systems to send real-time data or event notifications to MetamorphOS.
Instead of repeatedly requesting data from an API, webhooks push information automatically when a specific event occurs.
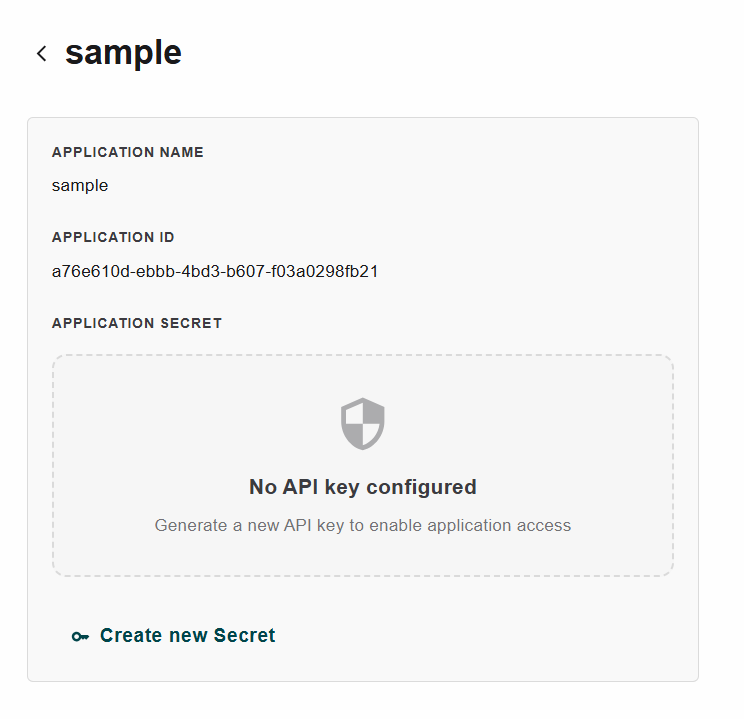
Before configuring a webhook, an API Key must be generated for authorization.
To generate an API Key:
-
Go to the Users Dashboard.
-
Navigate to the Applications section.
-
Click Add App.

-
Click on the app name.
-
Generate a new API Key and copy it.
-
Use this API Key for the Authorization of the webhook requests.
Webhook Endpoint
The Webhook Endpoint is the URL where external systems send HTTP requests when an event occurs.
- MetamorphOS generates a webhook URL for the integration.
- External services must be configured to send requests to this URL.
- The endpoint receives incoming payload data and triggers the corresponding workflow.
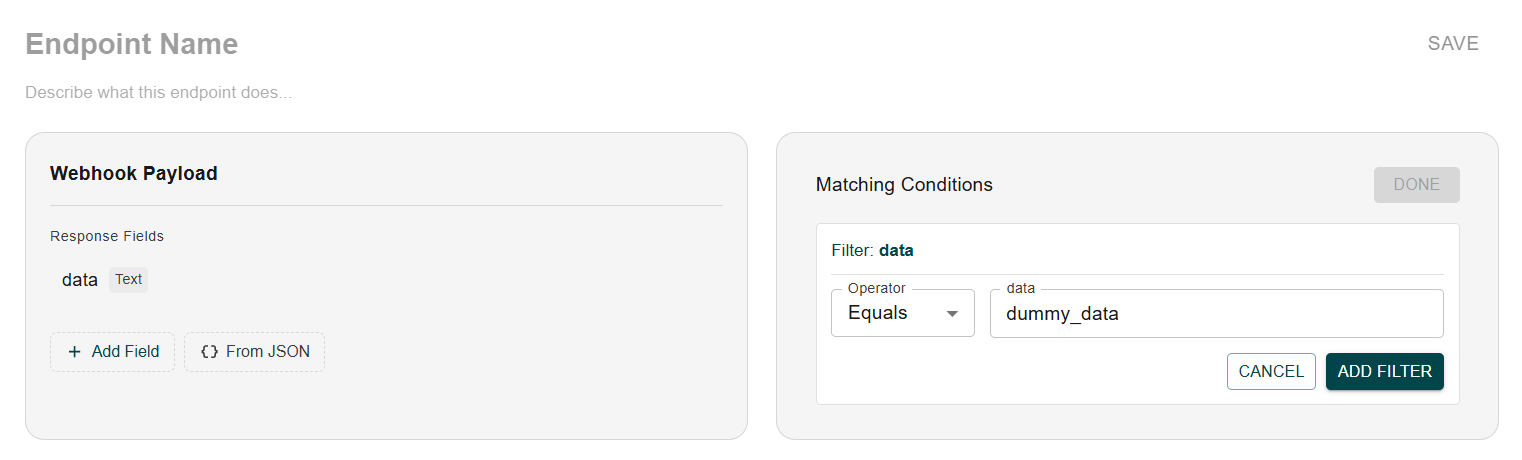
Webhook Payload
The Webhook Payload defines the structure of the data that the webhook will receive from the external system.
Users can configure the schema using the following options:
- Add Field – Allows users to manually define fields expected in the webhook request.
- From JSON – Automatically generates the schema by pasting a sample JSON payload received from the external service.
This structured schema helps MetamorphOS correctly interpret the incoming webhook data.
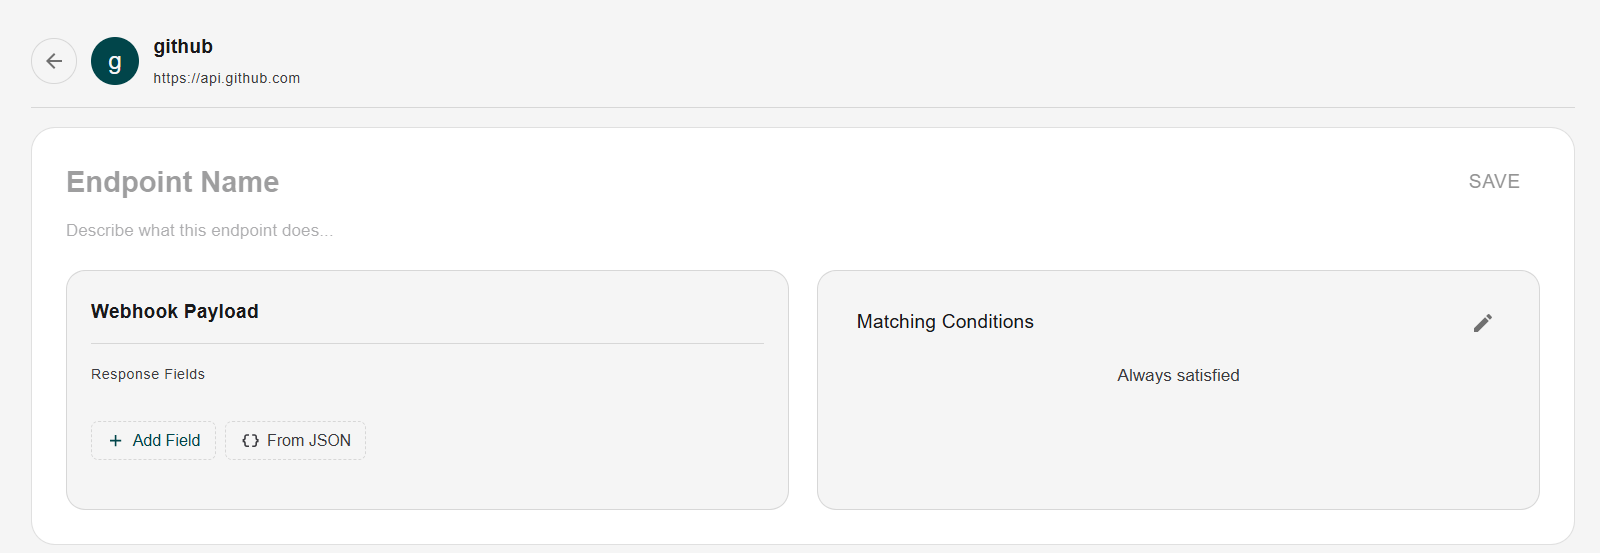
Matching Condition
The Matching Condition option allows users to define rules that determine when a webhook event should trigger a workflow.
- The webhook will only trigger an event when the specified condition is satisfied.
- Conditions are evaluated based on the incoming payload fields.
For example, a workflow can be triggered only when:
event_type = order_createdstatus = completed
This allows users to filter webhook events and trigger workflows only when relevant conditions are met.
Using Integrations in Workflows
Event Integration
To use a webhook event integration in a workflow:
-
Go to the Builder Dashboard.
-
In the bottom left corner, click Add Integration.
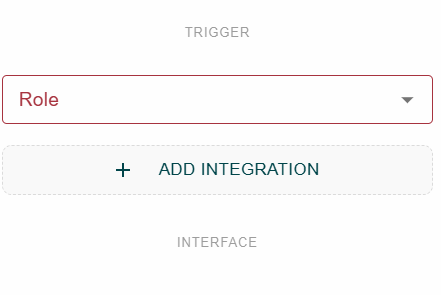
-
Select Integration Trigger.
-
Choose the integration trigger that was created previously.
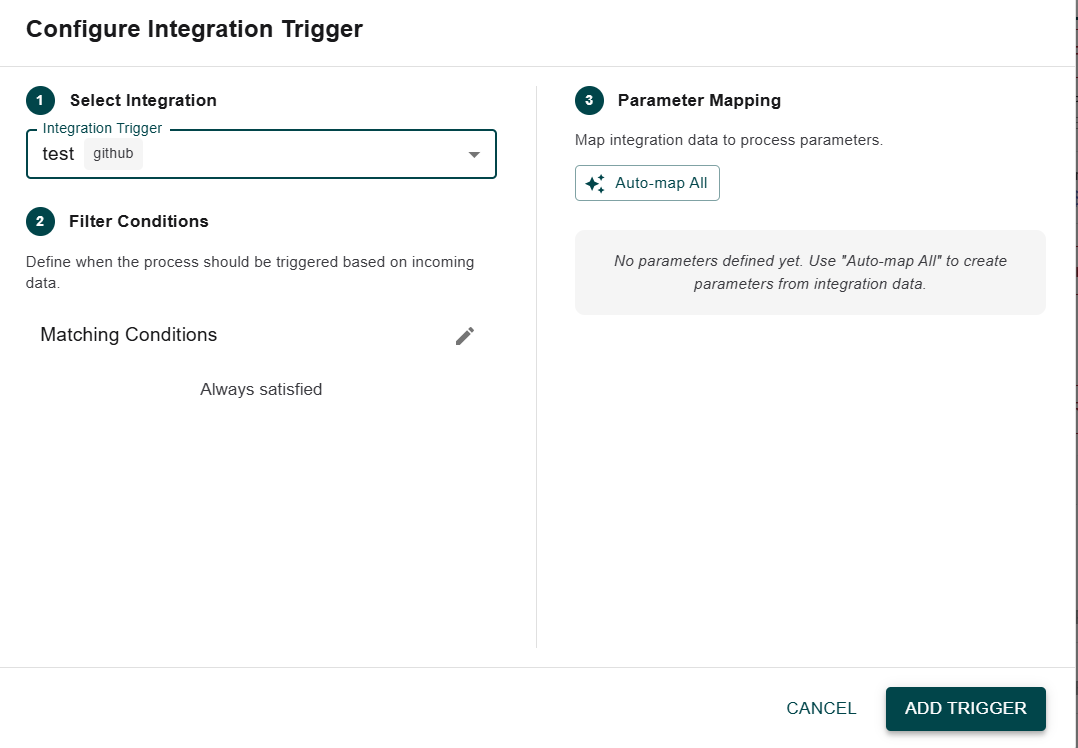
-
Add it to the workflow.
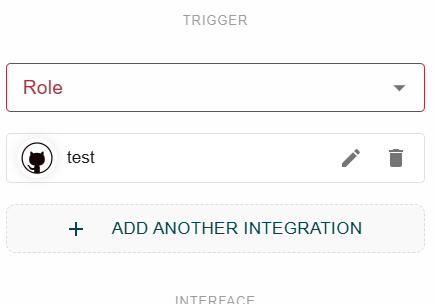
Once added, the workflow will automatically start when the configured webhook event is triggered.
API Call Integration
Follow these steps to use an API integration within a workflow:
-
Go to the Builder Dashboard and create a new process or open an existing one.
-
Right-click within the workflow canvas and select Add Step.
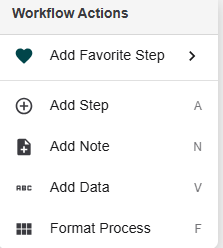
-
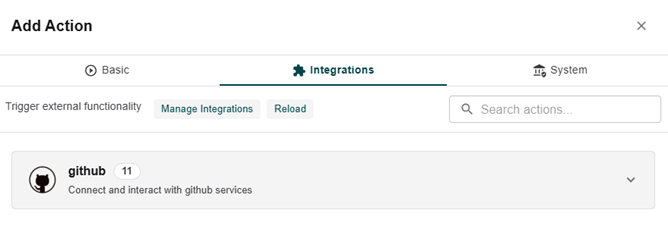
From the available step options, select Integration from the top middle to open the integration panel.
-
The panel will display all available integrations that have been configured in the system.
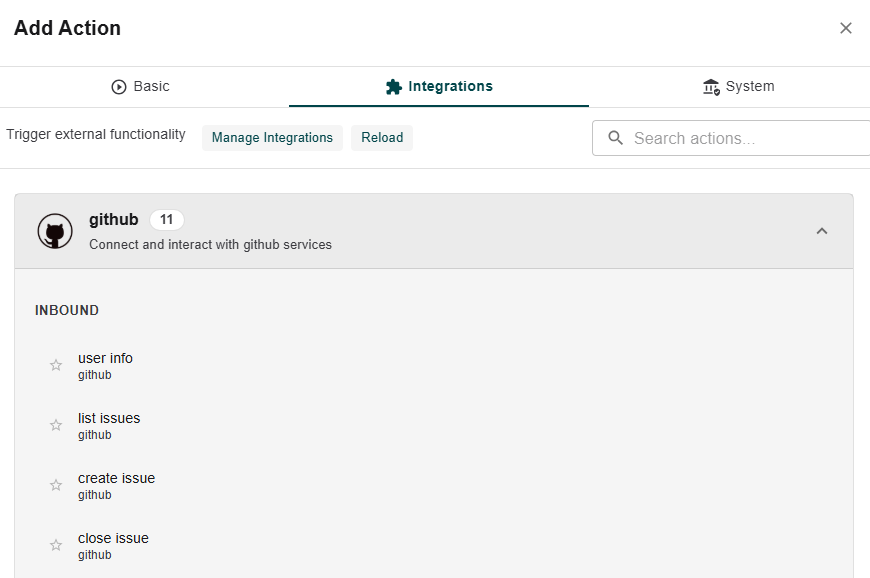
-
Click on the desired connector. A dropdown menu will appear showing all the available endpoints associated with that integration.
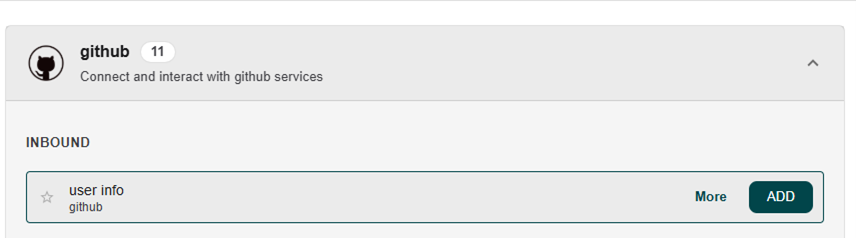
-
Choose the endpoint you want to use for the workflow action.
-
Click Add to include the selected integration endpoint in the workflow.
Once added, the workflow will be able to execute the configured API call as part of its process.